Tank and Artillery Guide
If you want to break enemy defenses instead of grinding them down at close range, tanks and artillery are the tools that change the fight. They solve different problems—one lets you survive and push through hostile territory, the other lets you hit spawners and worms from far beyond normal defenses—and this guide walks you through what to unlock, how to build the ammo and machines, and how to use them without getting overrun.
Unlock the right combat tech in the right order
Start with the 


Only move into 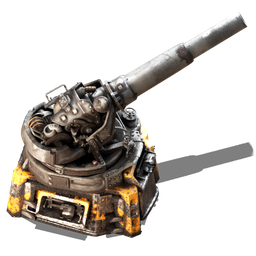


Use the tank to start breaking nests and clearing your path. Then, once your base can support heavier offense, pivot into artillery for long-range shelling and territory control.
Set up the shells and vehicle production before you deploy
Before you send anything to the front, build the production chain that keeps it alive. Tanks are simple compared to artillery, but both systems punish poor resupply.
Here is the core crafting reference you should have in view while you build your supply lines:
| Recipe | Inputs → Outputs | Machine | Time |
|---|---|---|---|
|
    |
 |
5s |
| Artillery Turret |  |
|
40s |
| Artillery Wagon |   |
|
4s |
| Artillery Shell |   |
|
15s |
| Explosive Cannon Shell |  |
|
8s |
| Cannon Shell |  |
|
8s |
| Railgun Ammo |   |
|
25s |
Treat artillery as a supply problem as much as a combat one. For tanks, keep enough
Also plan for buffer size. A
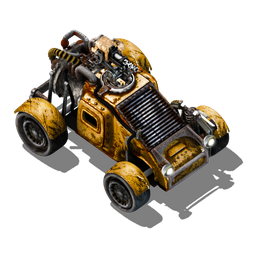
Build the Tank for pushing through enemy fire
Use the
Do not drive the Tank like a car with extra armor. It is slower, less responsive, and worse at dodging melee enemies or cliffs. Instead, treat it as a mobile assault platform. Bring support tools with you: grenades, poison capsules, follower robots, repair packs, and personal laser defense all work while you are inside the Tank. If you have a personal roboport, construction robots can still come out and repair it. After researching logistic system, the Tank can even make requests through the logistic network, which is worth using so you do not have to manually restock every run.
The cannon is strongest when you use its line and piercing behavior deliberately. Standard cannon shells are best for heavy single targets, while explosive cannon shells are better when enemies bunch together. If you are advancing into a nest, do not rely on the Tank alone to survive everything. Use its durability to stay in the fight, then let capsules, robots, and cannon fire do the rest.
One more caution: the Tank can drive through and destroy trees without taking damage, but it can also damage structures simply by ramming into them. That is useful when you are clearing a path and dangerous when you are near your own base. Slow down before you return home.
Use artillery where range matters more than direct contact
Use automatic mode when you want artillery to prune enemy structures inside its scan range. Automatic mode only targets spawners and worms. It will not target moving biters or spitters, so do not expect it to clean up a roaming attack wave for you. Its default maximum range is 224 tiles, and it also has a minimum firing range of 32 tiles, so it cannot solve close-in defense.
Use manual mode when you want to hit distant bases or unexplored territory. Manual targeting reaches 560 tiles by default, and shells reveal any chunks they pass through. That means artillery is not just a weapon; it is also a scouting tool for breaking open fogged areas. The 
Artillery shelling provokes a large enemy response centered on the impact site, so never fire it from an undefended position and assume the map will stay quiet. If you are using artillery, protect the firing site with walls, gun turrets, laser turrets, flamethrower turrets, or direct player intervention. Artillery is strongest when it is part of a defended logistics network, not when it stands alone.
Keep your artillery alive and your offense supplied
If you are using
This matters because artillery wagons are heavy for train acceleration. Use strong fuel, and if you have it, nuclear fuel is especially effective. The wagons also benefit from research: artillery damage, firing speed, and range all improve through technology. Infinite firing-speed research increases firing rate by +100% per level and applies to both artillery turrets and wagons. Range research increases both automatic and manual range by +30% of base range per level. If you are serious about artillery, invest in those upgrades together instead of stopping after the first unlock.
Do not forget the bottlenecks. Artillery shells stack to size 1, the
Pages featured in this guide
- buildingTank
- technologyAutomobilism
- itemExplosives
- itemAutomation science pack
- itemLogistic science pack
- itemChemical science pack
- itemMilitary science pack
- technologyArtillery
- itemConcrete
- buildingRadar
- technologyAutomation
- technologyMilitary
- itemUtility science pack
- itemEngine unit
- itemSteel plate
- itemIron gear wheel