Military Defense and Explosives Guide
If biters are reaching your walls, your outposts are spread out, or you need a cleaner way to secure rail lines and clear cliffs, military defense is the toolset that turns a shaky perimeter into something you can rely on. Start by getting a wall line online, then add gates where you need access, then feed the military production chain with enough iron, coal, stone brick, and steel to keep it moving. This guide walks you through what to unlock first, what to craft, and how to use walls, gates, mines, grenades, and cliff explosives in a real base without stalling your factory.
Start with the early defense unlocks that let you build a perimeter
Your first priority is 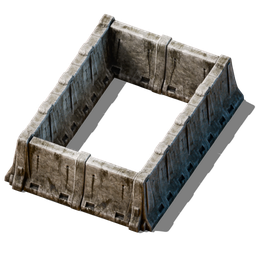


Once you have a wall line, move straight to 


At the same time, make 


Here is the quick reference you can use while laying out the early defense chain:
| Item | Recipe | Machine | Time |
|---|---|---|---|
|
|
 |
0.5s |
|
|
|
0.5s |
|
  |
|
8s |
|
|
|
10s |
 |
 |
|
5s |
 |
|
|
8s |
 |
 |
|
8s |
Set up the basic inputs for grenades, walls, and military science
Before you try to scale military production, make sure the base has steady iron plate, coal, stone brick, and steel plate.
So build the support lines first, not after the fact. Feed grenades from a stable iron-and-coal lane, keep stone brick flowing for walls, and make sure steel is already entering your main base before you start counting science packs. That way, when you add military science, you are expanding a working system instead of hand-crafting a temporary patch.
If you are planning throughput, the common baseline is 
Solve the explosive-material bottleneck before you try to mass-produce weapons
Once you start aiming for
Plan for that before you scale the rest of the military tree. Land mine takes
That last ingredient is the warning sign: Barrel is your cue that you need real fluid handling, not ad hoc logistics. A Barrel is used to store and transport fluids when pipes are unavailable, impractical, or undesirable. Fill and empty operations happen in 
The rule here is simple: get the supply chain stable first, then grow the military item counts. If you try to mass-produce mines or special ordnance before the rest of the chain is ready, your combat output will stall.
Use each military item where it solves a specific problem
Use
Cliff explosives are for cliffs only. They blow up cliffs and do not damage anything else nearby, and cliffs do not drop items when destroyed. That makes them ideal for cleaning up rail corridors, robot paths, and awkward terrain chokepoints without worrying about collateral damage. Once you have researched them, you can mark cliffs for deconstruction like other environmental obstacles, and construction robots in range can queue them for destruction if they have access to cliff explosives through the logistic network.
Land mine is your area-denial tool. It explodes when enemies are nearby, damaging and stunning them. Use it where biters are repeatedly hitting the same approach or where you want a cheap deterrent that buys your guns and robots time. Do not treat it as a replacement for walls; put mines behind or near the wall line, not in place of it.
Gate is the movement tool. It opens automatically for players and vehicles, and it has the same defensive strength as a wall. That means you can keep a perimeter sealed without turning your base into a traffic nightmare. Put gates on roads, at vehicle crossings, and at rail access points where you need uninterrupted movement but still want the line defended.
Wire gates into your defenses and scale your perimeter safely
When your perimeter gets larger, wire your gates only where you want control or detection. A gate can be connected to the circuit network by wiring a wall adjacent to the gate with red or green wire. Once connected, the wall shows a small yellow electronic box, and the gate can send a signal when a player or vehicle attempts to open it.
Use that behavior to build safer rail crossings and to detect movement at choke points. A circuit-connected gate is especially useful when you want a gate to act as a signal rather than just an opening. It can tell you when traffic is coming through, which makes it valuable in busy industrial areas and on secured rail lines.
Keep one caution in mind: gates are only safe when they are used intentionally. They do open for players and vehicles, and while they are open, enemies can slip through. That is why you should place them where the opening window will not compromise the rest of the wall line. If you are running fast or using a vehicle, do not assume the gate will always be open in time unless the approach is clear. Build your access points with enough space that your own movement does not create a gap in the defense.
For the cleanest setup, build in this order: wall first, gate second, military science production third, explosives support fourth, then mines and cliff explosives where they solve a specific problem. If you follow that sequence, you will get a perimeter that stays functional while your factory keeps expanding.
Pages featured in this guide
- technologyStone wall
- itemStone brick
- buildingWall
- buildingGate
- itemStone
- technologyMilitary
- itemAutomation science pack
- itemLogistic science pack
- itemSteel plate
- itemElectronic circuit
- itemMilitary science pack
- technologyAutomation
- itemPiercing rounds magazine
- itemGrenade
- buildingAssembling machine 1
- itemIron plate