Power Armor: Personal Defense Equipment Guide
If you’re getting to the point where basic armor and turrets are no longer enough, this is the equipment path that turns you into a much harder target and gives you stronger personal defenses. The catch is that these upgrades are gated behind research and expensive components, so the smart move is to unlock them in the right order, build the right production first, and then fit the armor with a loadout that matches the danger you actually expect to face.
Pick the first upgrade that matches your current problem
If your immediate problem is simply surviving longer, start with Energy Shield Equipment. It gives you a personal energy shield, which is the most direct survivability boost in this equipment set. If your problem is that you want the full platform for multiple equipment pieces, aim for 
Do not treat Power armor as just a raw stats upgrade. The real value is that bigger equipment grid. Once you have space for shields, offensive gear, and supporting equipment in the same suit, your character stops being a single-purpose combatant and starts becoming a flexible platform. Also remember that Power armor adds 20 inventory slots; when you take it off, that bonus disappears, and any items sitting in those extra slots can prevent you from unequipping it. Keep those slots clear before you swap armor, or you can trap yourself in a bad loadout.
Research the gates in the order that unlocks the rest of the build
The research tree here is chained tightly, so don’t try to brute-force the final gear before you have the prerequisite tech. Energy Shield Equipment needs 


A sensible path is to get Energy Shield Equipment and Laser turret first, then move into Power armor, and only after that push into Energy Shield MK2 Equipment, Personal laser defense, and Discharge defense. That order keeps you from stalling on missing prerequisites and lets each new unlock feed the next one.
Set up the expensive components before you queue the armor and modules
Before you start mass-producing the final gear, build the component chain that feeds everything. The common bottleneck is not the final recipe; it is the stack of advanced materials behind it. You will want a steady supply of 
Here’s a quick reference for the core recipes and craft times so you can plan your production lines efficiently:
| Item | Inputs → Outputs | Machine | Time |
|---|---|---|---|
| Discharge Defense Equipment | |
 |
10s |
| Energy Shield Equipment |   |
|
10s |
| Energy Shield MK2 Equipment |  |
|
10s |
| Laser Turret |   |
|
20s |
| Low Density Structure |   |
|
15s |
| Personal Laser Defense Equipment | |
|
10s |
| Power Armor |  |
|
20s |
The practical takeaway is simple: stockpile the upstream parts first. If you try to jump straight to
Craft the armor and fill the equipment grid with a clear role in mind
Make
Start by deciding what role the suit should play. If you are going into dangerous territory, prioritize survivability first by filling your grid with Energy Shield gear and then adding offensive military equipment once you have the space. If you are using the suit for safer travel or as a support loadout while clearing and expanding, lean toward the equipment that improves your ability to handle pressure without having to rely on external defenses.
Do not overbuild before the armor itself is ready. Energy Shield Equipment, Energy Shield MK2 Equipment,
Use the right defensive tool for the fight
Each piece of defense solves a different problem, and you should use them that way.
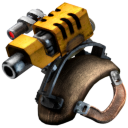
Be especially deliberate with Discharge defense. It damages, pushes back, and stuns nearby enemies when activated using the remote, so its value comes from stopping pressure right on top of you. Use it proactively when enemies get too close rather than waiting until you are already overwhelmed.
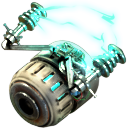
For Personal laser defense, remember that it is not an ammo problem; it is a power-and-slot problem. The same goes for
That means laser-based defense can create electricity spikes. Plan for that instead of reacting after your power grid stutters. Add accumulators, or use steam storage and excess steam turbines, so the system can absorb the surge when the lasers open up. If you ignore the power spike, your “advanced” defense can collapse at the worst possible moment.
Match the weapon to the enemy before you commit resources
One last caution: lasers are not universally good. They are excellent against small asteroids, but other asteroids have high laser resistance, so laser-heavy defense can become inefficient quickly. On Gleba, pentapods have high laser resistance, which makes
Use that knowledge to avoid overinvesting in a tool that fits only certain fights. For your personal equipment path,
Pages featured in this guide
- recipeEnergy Shield Equipment
- itemPower armor
- equipmentPortable solar panel
- itemMilitary science pack
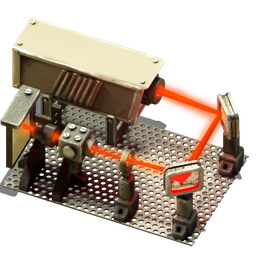
- buildingLaser turret
- technologyLaser
- technologyMilitary
- itemLow density structure
- technologyAdvanced material processing
- itemChemical science pack
- itemModular armor
- technologyElectric engine
- itemProcessing unit
- equipmentPersonal laser defense
- equipmentDischarge defense
- itemSteel plate