Space Platform and Satellite Production Guide
If your goal is to get a space platform running and keep launching satellites without your logistics stalling, build the platform around asteroid intake, storage, and chunk processing from the start. Do not treat the first platform as a place to add production later; it will stall if it cannot catch asteroids, store them, and turn them into usable material fast enough. This guide walks you through what to unlock first, how to set up the core platform buildings, how to handle the asteroid-crushing bottleneck, and how to plan the low density structure demand that satellites add to your launches.
Unlock the platform basics before you try to scale launches
Start with the research gate: 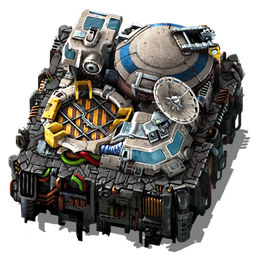

Once you can build the platform, prioritize the core support pieces before you worry about throughput. The 


Use those two as your first checkpoint. You want enough Asteroid collector coverage to bring in small asteroids, and enough Cargo bay capacity that your hub and landing pad do not choke on inventory limits. If you skimp on storage, the whole platform will feel broken even if the rest of the build is correct. Also remember the hard limitation: Asteroid collector collects only small asteroids. Large asteroids must be broken up by turrets before the collectors can use them.
A good rule here is simple: do not chase output before you have the platform pieces that prevent stalling. If the platform cannot accept, store, and route asteroid material, no amount of later optimization will help.
Set up asteroid intake and make sure your platform can actually feed itself
The intake loop on a space platform is a chain, not a single machine.
The next building you need is the 
Here is the quick reference you can keep handy while laying out the platform:
| Item / Building | Recipe or function | Machine | Time |
|---|---|---|---|
|
|
|
10s |
|
|
|
10s |
|
|
|
10s |
 |
  |
|
30s |
 |
|
|
60s |
Do not build a collector-heavy platform without enough chunk handling. If you do, you will pile up blocked inputs and waste precious platform space. Build for the full chain, even if the first version of it is small.
Use Crushers to turn chunks into a stable resource stream
Once the platform is catching asteroids, the next question is what you want the Crushers to do. The Crusher supports metallic, carbonic, and oxide crushing recipes, plus matching reprocessing recipes and advanced crushing recipes.
Use the simplest crushing recipe that matches your current need first. If you just need reliable platform supply, basic crushing is the safest place to start. The Crusher can also do metallic asteroid reprocessing, carbonic asteroid reprocessing, and oxide asteroid reprocessing, and reprocessing is the better path when you are trying to improve quality over time. 
Keep the specialized recipes in mind, but do not overcomplicate the first build. Advanced crushing recipes exist for metallic, carbonic, and oxide chunks and return the input chunk while adding extra resources. Use them when you actually need the byproducts, not just because they exist. For example, the advanced metallic recipe adds iron ore and copper ore; the advanced carbonic recipe adds carbon and sulfur; the advanced oxide recipe adds ice and calcite.
If your immediate goal is stable supply for the platform itself, stay with basic crushing until the intake loop is steady. Then add reprocessing for quality work or advanced crushing for extra material. That sequence keeps you from turning your first platform into a tangle of specialized machines before it can reliably feed itself.
Automate Crusher switching so mixed chunks do not clog the line
If you expect mixed asteroid chunks, wire your Crushers early. The Crusher can be connected to the circuit network to select its recipe automatically, and that is the easiest way to avoid constant manual recipe swapping.
Be careful with priorities, because the Crusher does not simply pick the right thing on its own. It follows a fixed priority order: explicit recipe signals over item signals, then crushing over reprocessing over advanced crushing, then metallic over carbonic over oxide, then default item order, then quality. That means a single metallic signal can override an oxide-only setup. If you are not intentional with the signal network, a mixed belt or buffer can make the Crusher switch away from the recipe you expected.
Use this to your advantage. If you want a Crusher locked to a specific asteroid flow, send the cleanest, most explicit signal you can. Also remember that unresearched recipes are ignored, so do not rely on automation for a recipe you have not unlocked yet. If you are building for quality farming, let the network support that plan rather than fighting it.
The main thing to watch for is clogging from mixed inputs. As soon as you start pulling more than one chunk type, circuit control stops being optional and becomes part of the layout.
Plan satellite production around low density structure demand, not just rocket parts
This is where many space builds get underestimated.
In the base game, each rocket part requires 10 low density structures, and a complete rocket uses 50 parts, which means the completed rocket launch requires 1,000 low density structures. On top of that, launching with a satellite requires 100 low density structures per satellite. In Space Age, the demand drops sharply: each rocket part requires only 1 low density structure, so a complete rocket consumes 50 low density structures per launch. Space Age also adds low density structure productivity, which increases effective output from factories that craft low density structures.
That means your production target depends on the game mode you are in. In the base game, scale your factories for very high demand and include the satellite cost in your planning from day one. In Space Age, the raw demand per launch is much lower, so you can build more modestly at first and then expand with productivity as soon as you can. Either way, do not size your low density structure line only for the rocket parts you see on paper; include the extra 100 low density structures for each satellite.
If you are in Space Age, research low density structure productivity as soon as it is available. That is the cleanest way to stretch your factories without needing as much raw input.
Add speed only when the platform can already keep up
Speed modules are a scaling tool, not a fix for shortages.
Use them only after the platform can already support itself. If your collectors, Crushers, and low density structure production are not stable, speed modules just make the shortages happen faster. They are most useful when you are scaling a machine that already has secure input and output.
Do not worry about the quality penalty breaking your output completely. The quality bonus of any machine can never fall below 0, so speed modules cannot reduce a machine’s quality below baseline. The penalty only counters quality modules. That said, speed modules still raise energy use and pollution because they increase power consumption, so install them where the gain is worth the extra load.
The cleanest order is: get intake working, get chunk processing stable, solve low density structure demand, and then add speed where the line is already proven. If you follow that order, your space platform will launch satellites without constantly stalling at the worst possible moment.
Pages featured in this guide
- technologySpace platform
- buildingRocket silo
- buildingAsteroid collector
- buildingAssembling machine 1
- itemLow density structure
- itemElectric engine unit
- itemProcessing unit
- buildingCargo bay
- itemSteel plate
- buildingCrusher
- itemSpeed module 2
- itemSpeed module
- itemAdvanced circuit
- itemSpeed module 3
- technologyAsteroid reprocessing